What is a Branded Favicon?
Ever notice that some websites have neat little custom icons next to them in your browser tabs when you load them up?
These icons add an element of unique branding to websites, giving them a professional appearance.
They’re known as branded favicons.

Favicons are literally “favorite icons” – short for when bookmarks for websites were called “favorites”. They are very small (usually 16 x 16 pixels). In addition to appearing in the address bar, favicons also appear in browser tabs, bookmarks, and the links bar.
How do you Create a Branded Favicon?
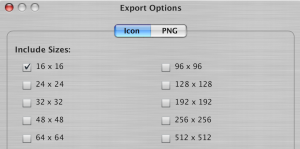
Traditional favicons are saved in the ICO graphic file format (used for old school Windows icons). Photoshop used to be able to save to this format, but no longer does. Not to worry – just create a 16×16 pixel GIF or PNG and use the icon utility ConvertIcon.
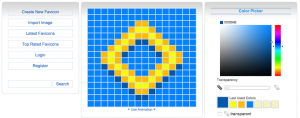
There are even online tools like favicon.cc or the favicon generator to help you create and save them.
A newer type of icon is the Site Icon, used by WordPress. The Site Icon can be a PNG or GIF up to 512 x 512 pixels. Once uploaded, WordPress automatically creates a favicon, along with many other icon sizes in between for various mobile devices.
Adding a Favicon to your Websites
Once you have your custom 16×16 favicon in the ICO format (or 512×512 Site Icon), here are some instructions on how to get them working on your site or blog:
Favicons on websites
Favicons can be hand coded into any HTML file with a single line of code in the HEAD section:
However, doing this for every page in a site is tedious and prone to inevitable error. An easy workaround is that most browsers will automatically look for a file called favicon.ico at the root level of your site. If you simply copy your favicon file to your root level, you should be good to go.
Favicons on Blogger blogs
Easy. Go to the Blogger admin page and click on Layout. You’ll see on the top left of your layout an area called Favicon where you can upload your ICO file by clicking on “Edit”.
Favicons on WordPress sites
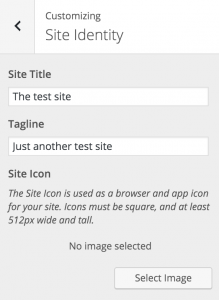
WordPress users have it a little easier – they can use PNG or GIF files that are 512 x 512 pixels. WordPress will resize as needed. Just go into Appearance / Customize in your WordPress admin page. Most themes will allow you to customize your “Site Identity” which includes a custom site icon. Just click on “Select Image” and upload your 512 x 512 PNG or GIF image. WordPress takes care of the rest.
Now that you know what favicons are and how to create them – why don’t you make one for your blog?


Leave a Reply