Install Google Analytics 4 on your WordPress site

Google Analytics is one of the most widely-used web analytics platforms in the world – used by 56.8% of all websites globally as of today. In 2019, Google came out with a new updated version referred to as Google Analytics 4 (GA4). This post will walk you through how to install Google Analytics 4 on your WordPress site.

Before you begin

If you are signed in to multiple Google accounts (A UNI account, your personal account, etc) this can cause issues when you are creating these accounts. To avoid problems, open an Incognito window in Google Chrome. Using this window, you’ll be signed out of all accounts and can proceed intentionally, only signing into the one Google Account you wish to use.

1. Create a Google Analytics Account

(If you already have one, skip to step 2)

Creating a Google Analytics account is quick, easy, and free. You’ll need to navigate your browser to the Google Analytics website and log in using your Google account.

You’ll have to enter a name for your account (like… “Matthew’s Personal Account” or “My Digital Advertising Account”). It will then ask for permission to share data – only sharing with “Google products and services” is necessary – the other options are up to you.

2. Create a Property to Manage

Once your account is set up, Google will ask you to set up your first property.

You’ll need to give your property a name – I’d use the name of your website. Then set the time zone and currency.
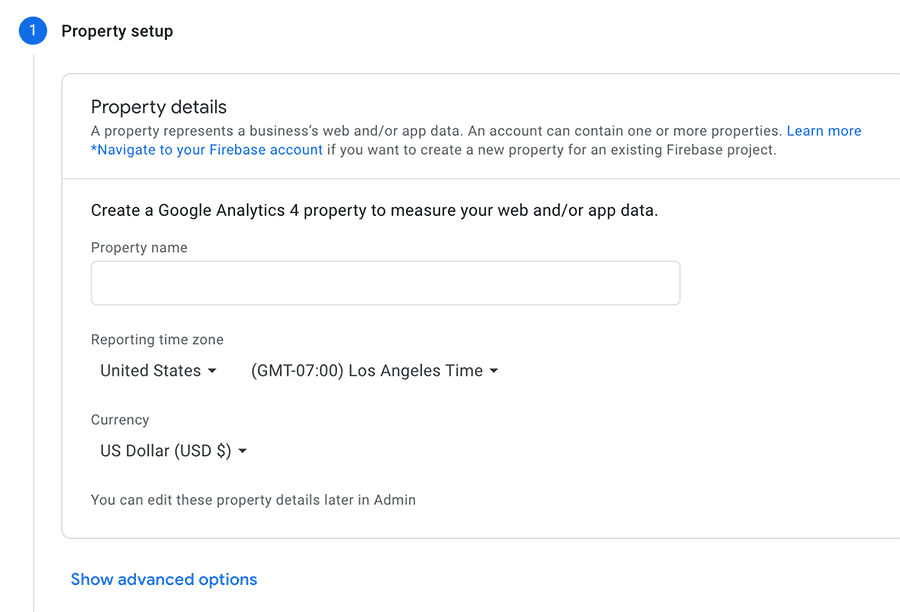
Google will then ask some general questions about your “business” – don’t be alarmed – just select a category that describes your website, put that you have one employee, and check any boxes that sound like they’d be useful.

Next, you’ll want Google to know the type of property you want to manage.
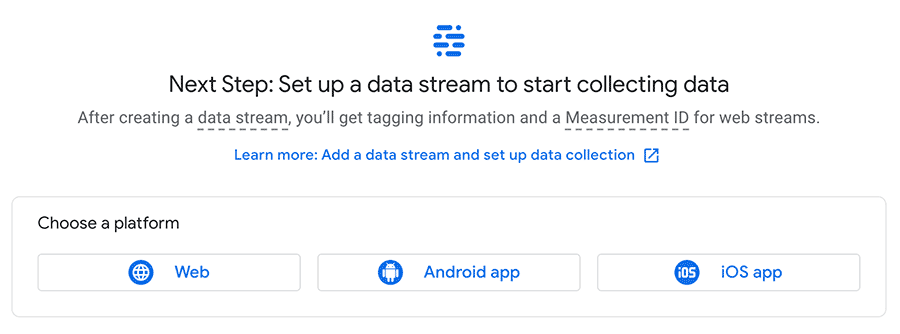
Since we want to use Google Analytics 4 on your WordPress site, select “Web”.
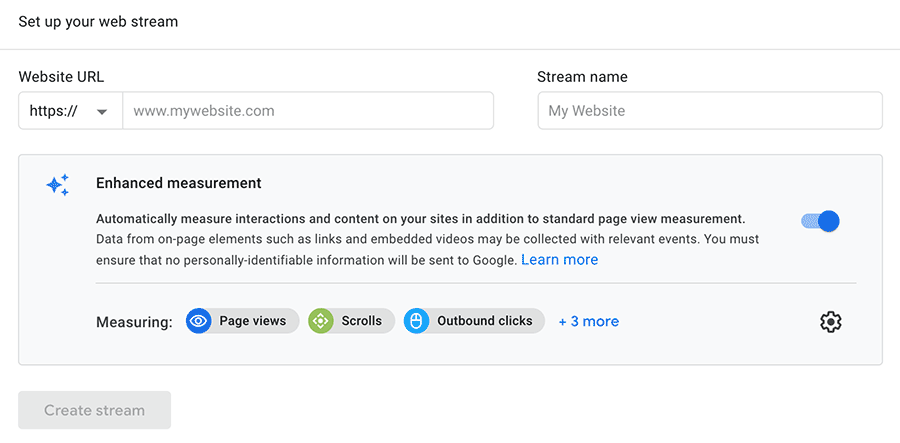
Type in your Website URL and give your stream a name (“My Website Stream” is fine). Be sure “Enhanced Measurement” is enabled. Then click “Create stream”.

Great! You’ve created a Google Analytics account and a web property for your website! Now – keep this window open and open a new tab in your browser to complete the next step.

3. Create a Google Tag Manager Account

Now that you have a GA4 account and web property, we need to get you set up on Google Tag Manager so you can connect your GA4 web property to your WordPress website.

Let’s head over to tagmanager.google.com to create our GTM Account. Log in with the same Google Account you used to create your Google Analytics account. Click “Create Account” to get started:
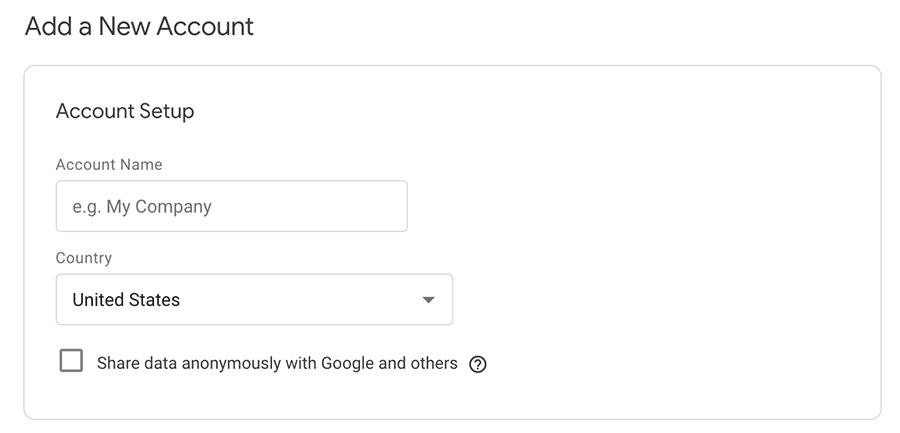
Once you’ve given your account a name and country, you can set up your first container:
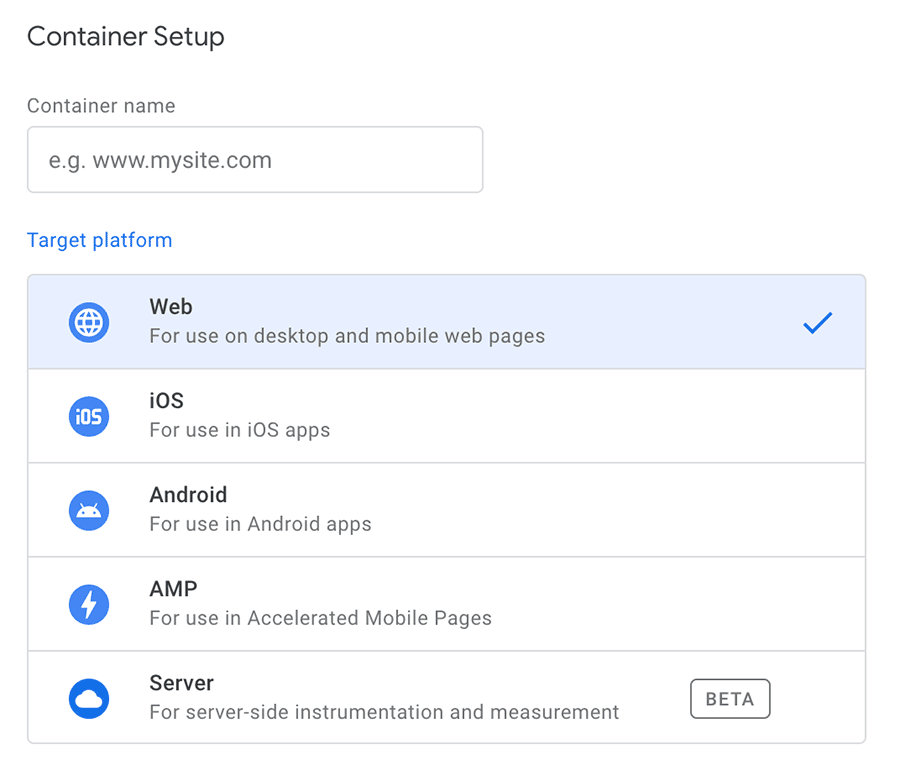
Be sure to check that your Target Platform is “Web” – since your WordPress site is a website, not a mobile app.

4. Add a Google Analytics 4 Tag to your Container

Now that you have created your container, you’ll want to add a GA4 tag to your container and set it to fire every time a page on your website is loaded.
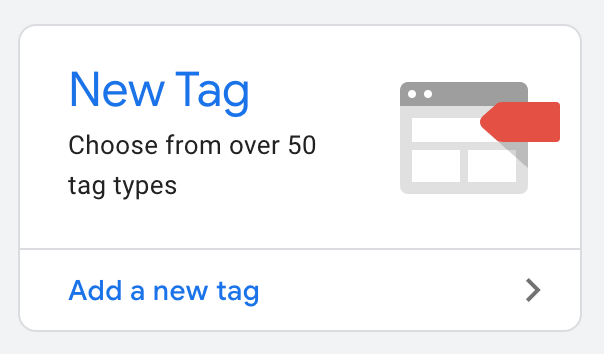
We’ll want to give our tag an identifiable name (like “GA4 Tag”) and select a tag type. Choose the tag type: “Google Analytics: GA4 Configuration“.

Next, you’ll need to add your GA4 property’s Measurement ID so that Google knows which Analytics property to use. You can find your Measurement ID in your Google Analytics web stream details.

Now we’ll select a firing trigger that will determine when to run our code. In our case, we’ll want it to run on All Pages.
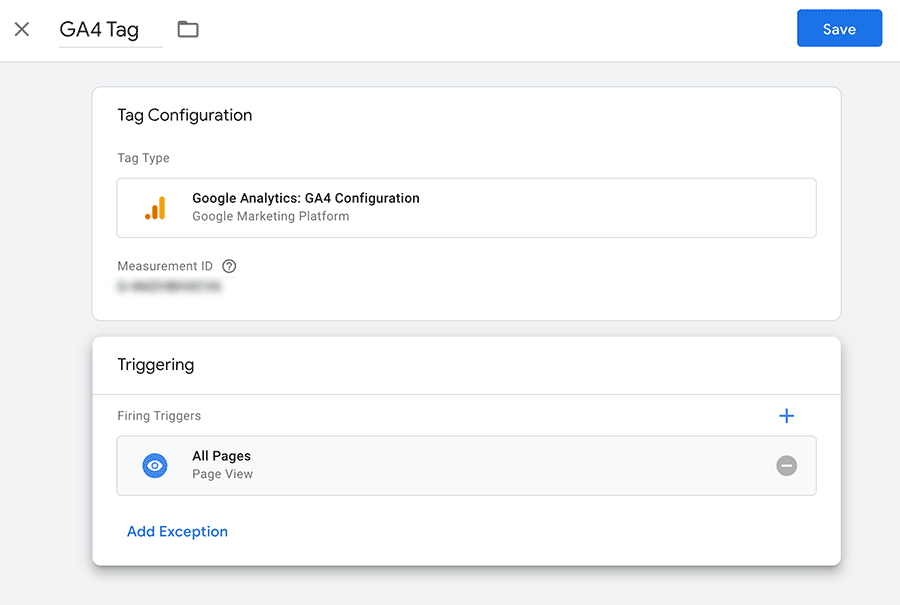
When finished, your tag should look something like this. Save this tag configuration and click “Submit” to publish your tag.

5. Last Step: Configure the Google Site Kit WordPress Plugin

Ok, you’re nearly there! One last thing to do: Log in to your WordPress Dashboard and click on Plugins. If you don’t yet have the Google Site Kit plugin downloaded and installed, you’ll want to quickly do that.
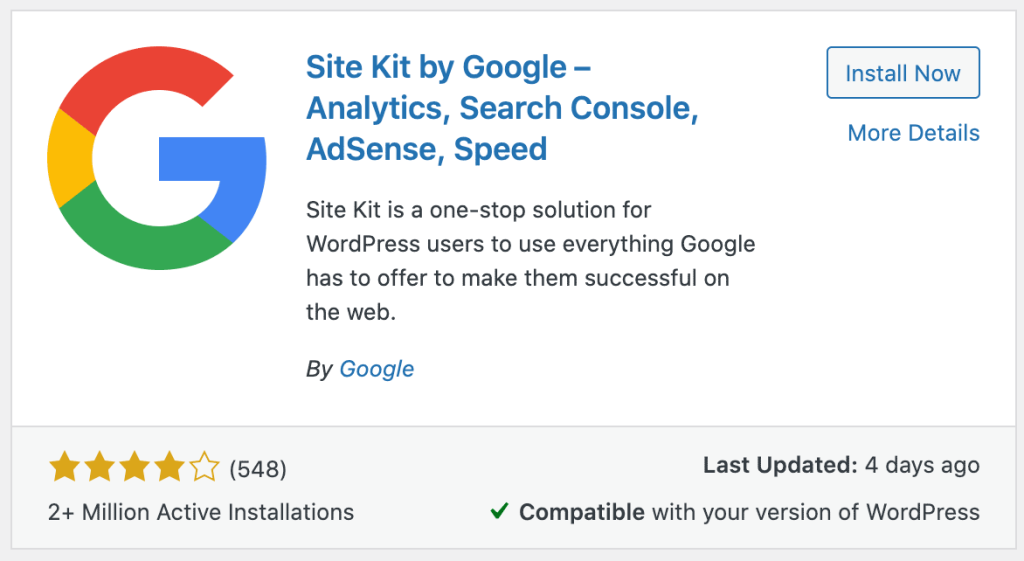
The Site Kit by Google WordPress Plugin

Go to Site Kit’s Dashboard to set it up – first you will need to authenticate with your Google account by clicking on the “Sign in with Google” button:
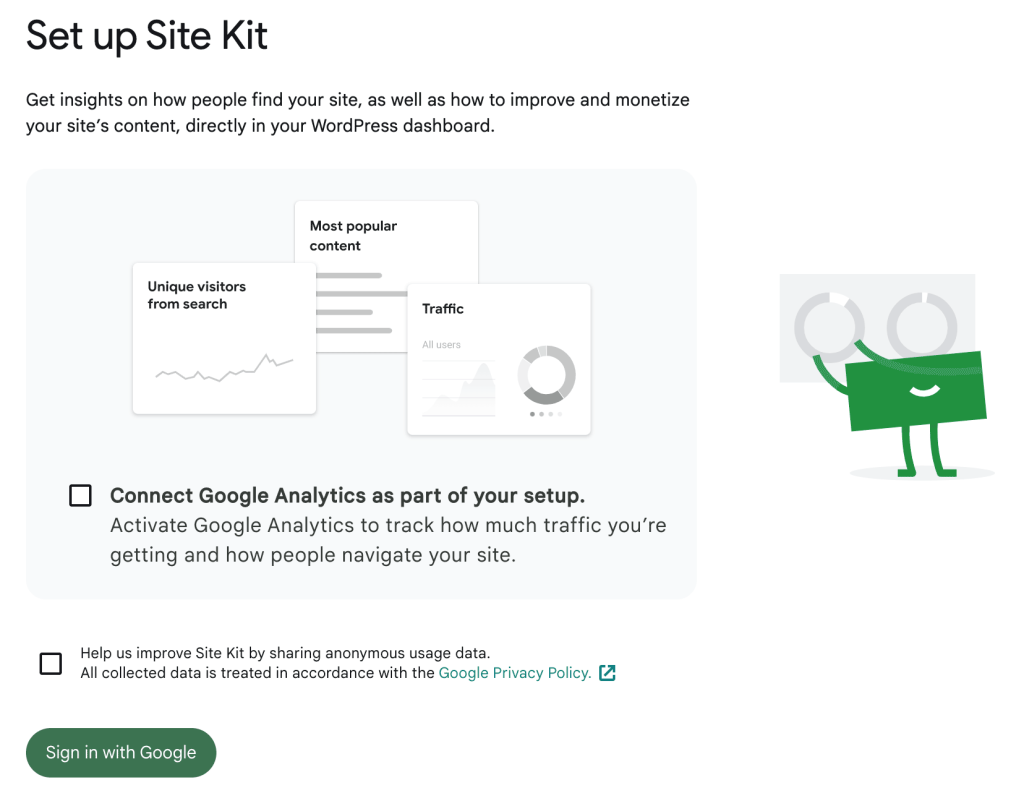
You will need to give Google Site Kit access to data from your GTM, GA, and GSC accounts.
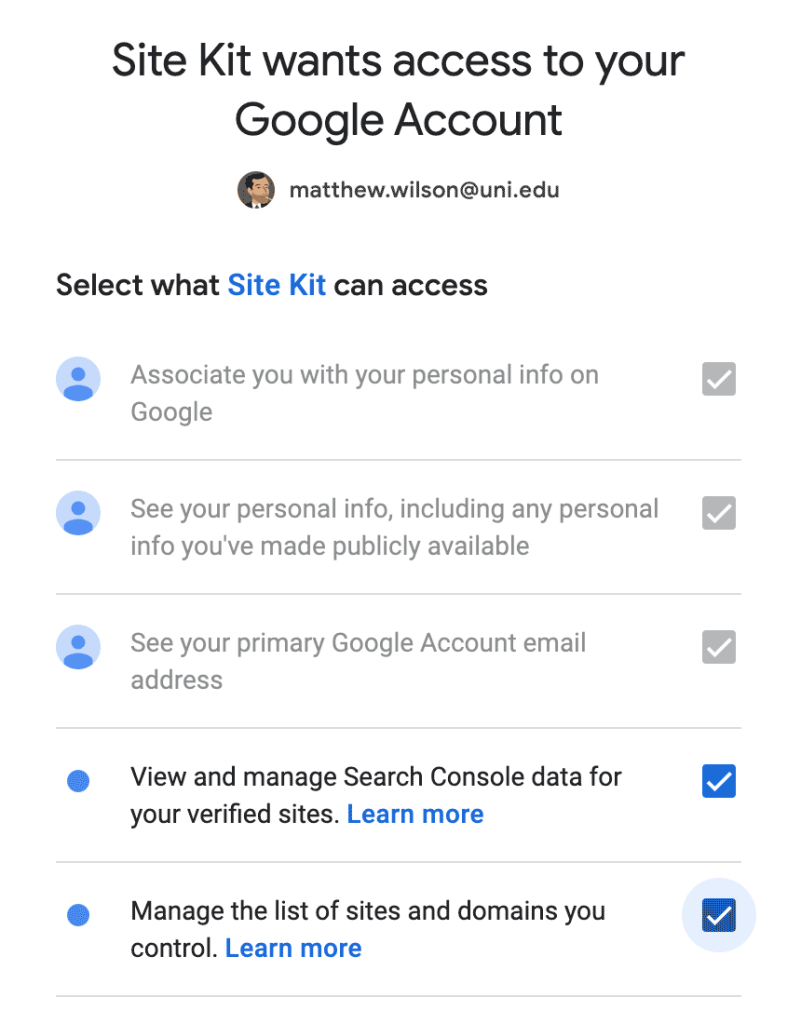
Give Google Site Kit Access to the data it needs.

Once you have given access to Site Kit, you should see Tag Manager appear with a green check mark in “Connected Services” in your Site Kit Settings.
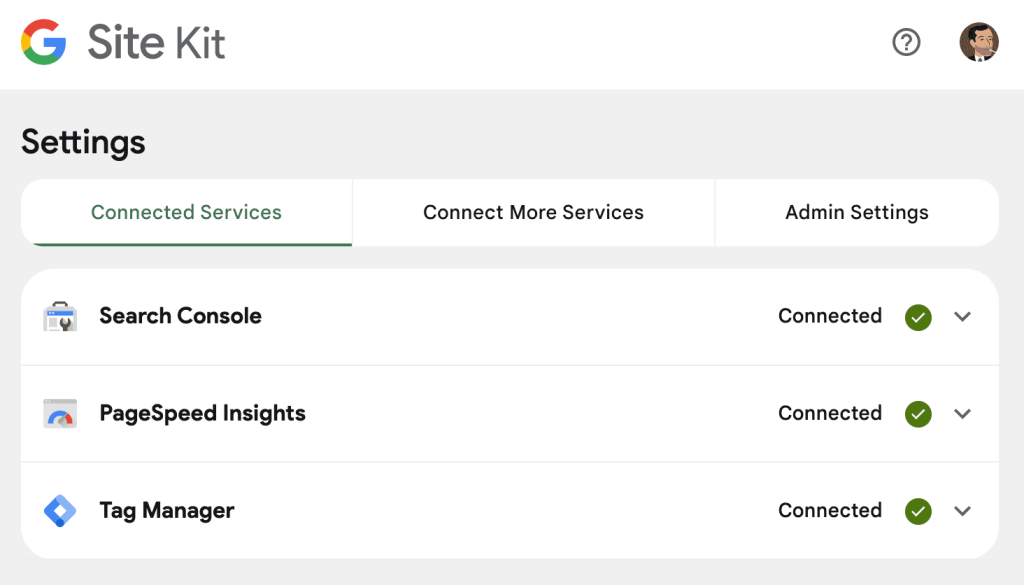
This should be all you need to get started – however, if you’d like to view your Google Analytics data in WordPress itself (without having to log into Google Analytics) – you’ll also need to connect your GA4 account.
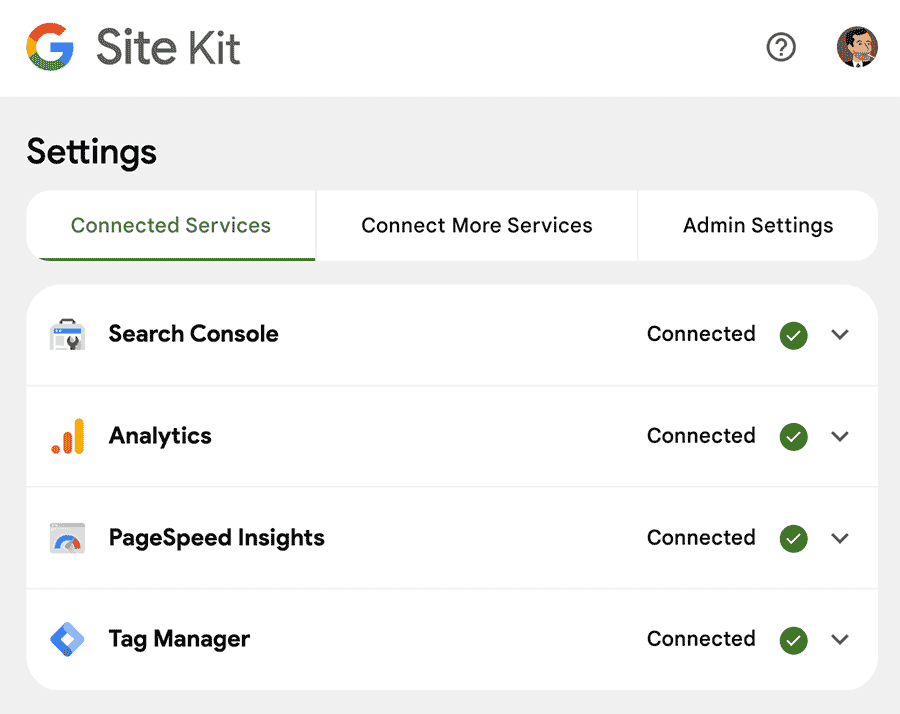
Site Kit with all services correctly connected.

Once you have Tag Manager, Search Console, and Google Analytics connected, you should be all good!

I Lied – There is One More Step!

We need to confirm that everything is working properly!

The easiest way to do this is to load your website in a Google Chrome Incognito window and while leaving that open, check your Google Analytics Realtime Report to see if you show up.
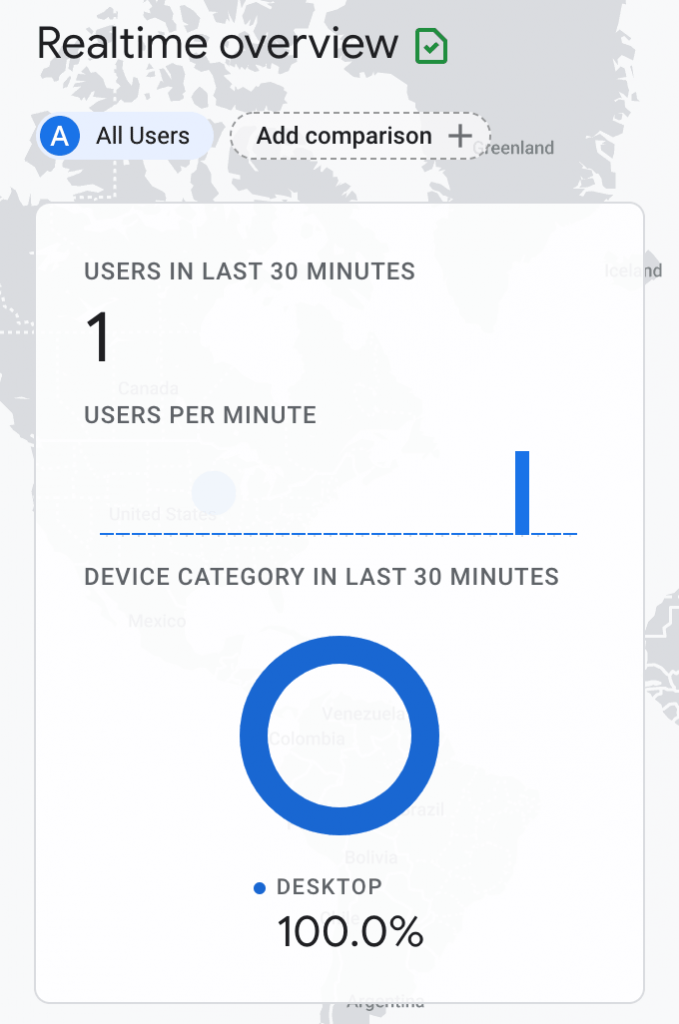
Hey look – there I am!

Once you have confirmed that Google Tag Manager has fired your GA4 tag from WordPress – you truly are done and should remind yourself how awesome you are!

You Have Now Installed Google Analytics 4 and Google Tag Manager on your WordPress site!

How to Find Content Ideas

As a content marketer, you’ll need to constantly come up with content ideas to build, maintain, and grow your audience. This article will give you a couple of tips and tools to help you brainstorm great content ideas for your website or channel.

Use Google Intentionally

When doing Google research to find content ideas, always pay attention to the “People Also Ask” section in the search results. This might give you a new or different direction for your content.

People Always Ask example within a Google search for “Content Marketing”

Also, don’t forget about the “related searches” at the bottom of each Search Engine Results Page (SERP). Google uses its historical search data to give related searches that might be more specific than your original idea. Being specific is generally a very good thing – as it allows you to create more focused content that may stand a better chance of being ranked.

“Related Searches” example from Google search for “Content Marketing”

These will often give you very relevant and specific ideas for content that Google users are searching for.

Google Trends will allow you to search historically for terms to see how the search volume has changed over time. This will give you a good idea about what terms to use and which to avoid. You can also compare two different terms to see which is more frequently searched for on Google.

Google Trends results showing comparative search volume
between terms “content marketing” and “inbound marketing”

Answer The Public

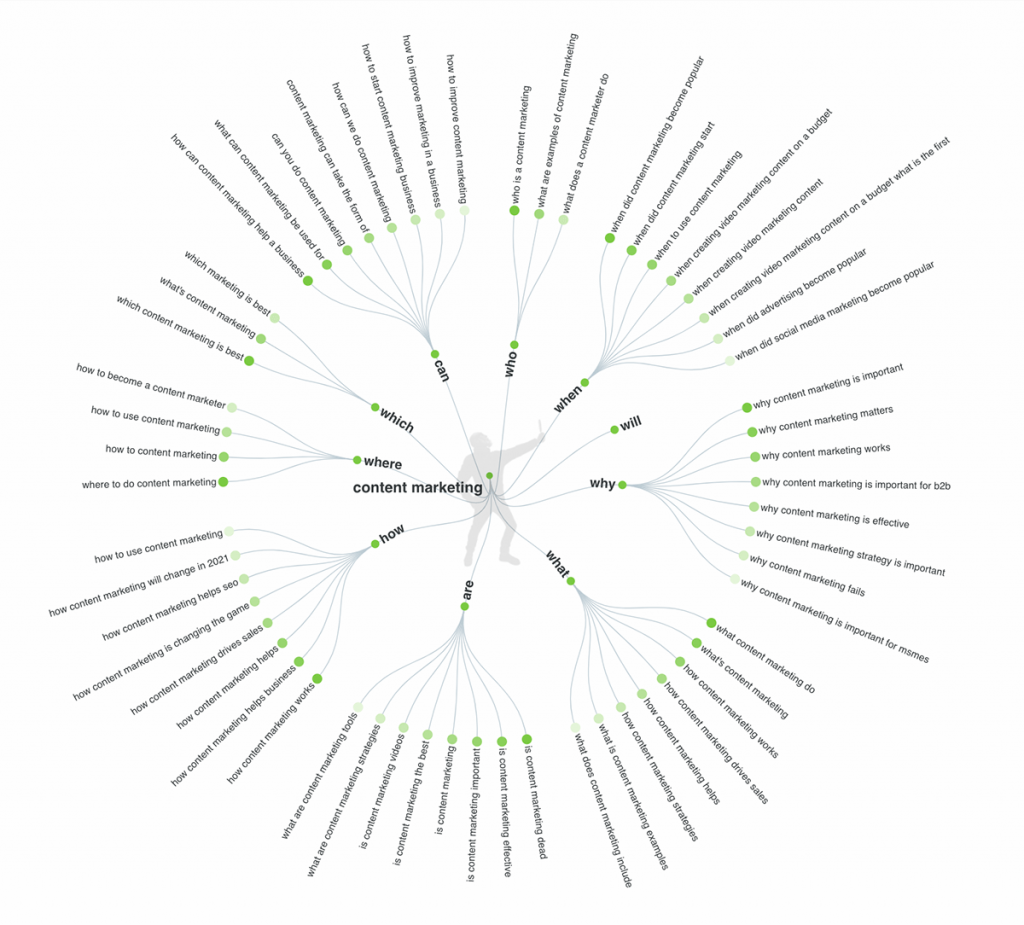
Answer The Public is a site that also uses Google search data – but ATP uses this data to show you questions that Google users ask that are related to your topic.

ATP results: a visualization of related questions

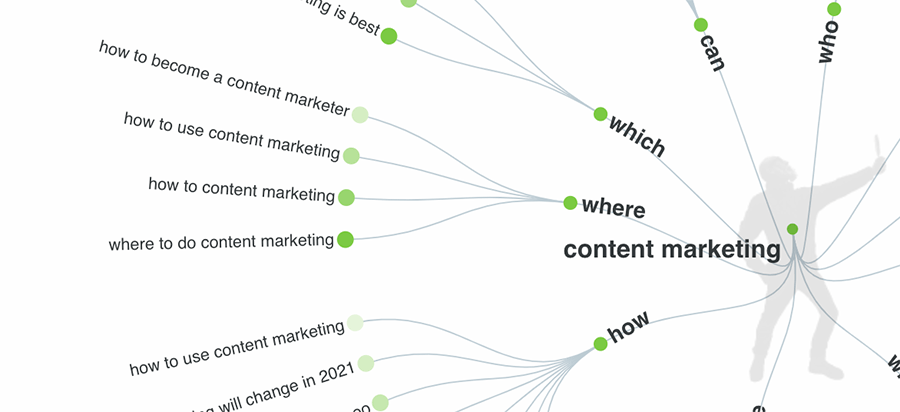
ATP gives you a detailed report with many visualizations related to key questions, prepositions, and comparative words.

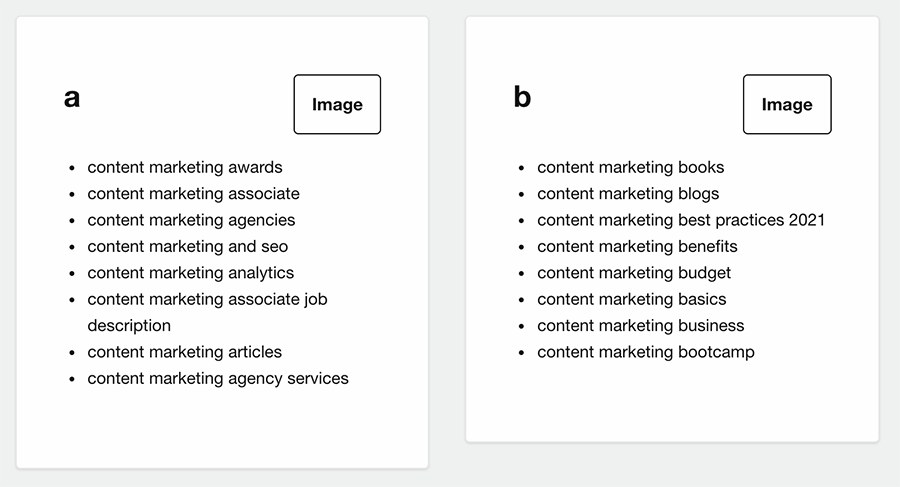
It also breaks results alphabetically for another way of brainstorming.

Twitter trending topics always can give you a finger on the pulse of what is being talked about right now. Get the most up-to-date and current content ideas by visiting trending topics often.

Getting content ideas on Instagram: the Explore Page

The explore section of Instagram has collections of content that Instagram believes you will be interested in. If content appears on your explore page, chances are good that the content is popular among others like you.

How to Archive Your WordPress Content

Now that you have spent a semester working hard to create content marketing content on your branded website, you will want to archive your WordPress content for future reference.

Why Archive Your WordPress Content?

There are many reasons to archive your WordPress site and its contents. The top three are:

1. Use in your Portfolio

Many employers hiring for content marketing positions will ask for work samples or writing samples to show that you can create content. This is a good reason to spellcheck your posts, as typos in your portfolio content are a definite dealbreaker for employers!

2. Indulge your Inner Archivist

If you’re the type that likes to save and archive your creative efforts – having these saved in a format you can easily view in the future will give you great satisfaction.

3. Keep your Personal Brand Active

Some of you may even want to transfer your WordPress content to a new server with your own domain name that will allow you to keep your site going into the future.

Methods to Use to Archive Your WordPress Posts

Take “full page” screenshots

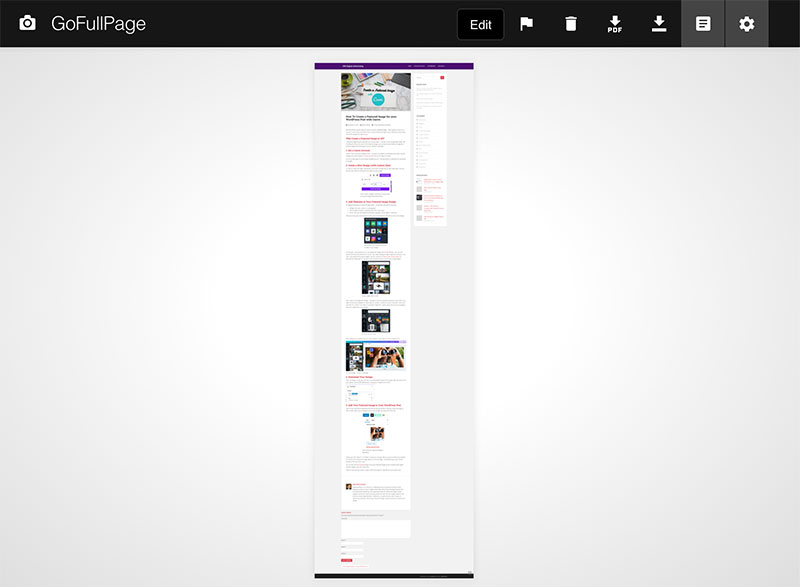
Use a Chrome extension like GoFullPage to take large screenshots of your entire posts. Then download and save as large PNG image files or PDF files.

A WordPress post after capturing with GoFullPage.

Saving your content as large image files or PDFs will give you lots of flexibility – however it should be noted that if you were to ever need the text / copy of your posts, saving as an image format will not allow you to select or copy the text itself.

Print Your Pages and Posts as PDF Files

PDF files are ubiquitous – everyone can view them regardless of the operating system they use. PDFs can also be easily printed

Most browsers and systems allow users to print webpages directly to PDF files using the “Print” command.

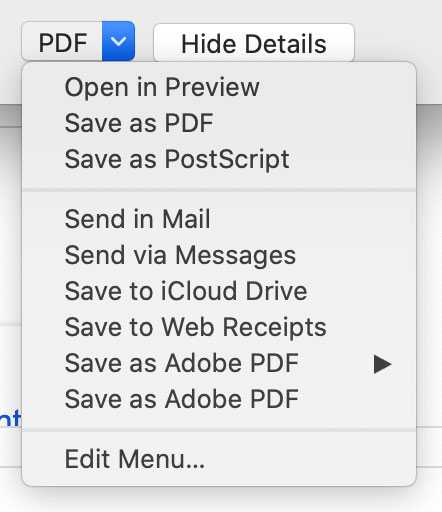
On Macs, this is as simple as selecting the PRINT command, and going to the drop-down menu at the bottom left of the print dialog box:

The PDF drop-down menu in the Print command dialog box

On PCs you can print to PDF files by following these instructions.

Transfer Your Entire Site to a WordPress Installation on a New Server

This is the best option, as it preserves the native format of your content, saves your SEO work, and preserves the visual design of your site. It also gives you the option to continue your website into the future!

To do this, follow these instructions on how to export your WordPress site, secure a web hosting plan with your very own custom URL, install WordPress, and import your site to its new home.

How To Create a Featured Image for your WordPress Post

Most WordPress themes allow for posts to contain a featured image – which appears at the top of the post. In this article, you’ll learn how to create a featured image for your WordPress post using a cool online design tool called Canva.

A featured image will give each post more visual impact – and also a clear recognizable header. By including the title of your post in the featured image, you can also use your featured image as a preview image when sharing your post on Twitter or Facebook.

1. Get a Canva Account

Canva is free to use and available online – so there’s no software to download and install. You just navigate your web browser to canva.com and click on the “Sign Up” button.

You can quickly login to Canva using a Google account – that way there’s no password to remember (or forget!).

2. Create a New Design (with Custom Size)

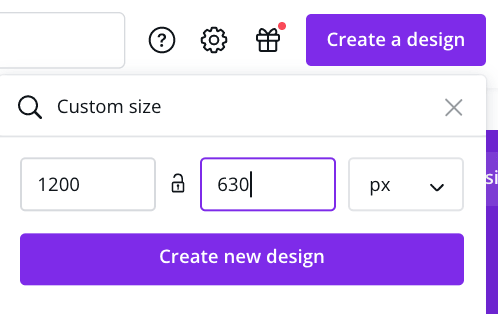
To Create a Featured Image in WordPress, you’ll want a design that is 1200 x 630 pixels. This size will also work well as a Facebook and Twitter preview image.

Click “Create a Design” and choose “Custom Size” to set your design’s pixel dimensions.

I’d suggest keeping your featured image simple – containing a few distinct elements:

  • Background (color, texture, or photograph)
  • Clearly legible headline consisting of the title of your post
  • One or two eye-catching elements (photos, graphics, emoji, logos, or symbols)

There are many apps and integrations with Canva to find graphic elements to use in your design.

Get content from a variety of sources to utilize in your design.

For example – Canva allows you to use royalty-free images from Pexels directly – you can even search the Pexels site directly from Canva – this makes finding the right image fast and easy. In my case, I was trying to find a good image to use for my post on “How to find Content Ideas” so I searched for “binoculars” to metaphorically illustrate someone searching for content ideas.

Pexels image search screen

Once I had a nice background image – I decided to look for a graphical element to add a little more depth to the visual metaphor of “searching” for content. I clicked on Canva’s “Elements” menu and searched for “content” on a whim, to see what I might find – luckily, there were some icon designs I liked and I added them to my design.

Closeup of Canva search tool
Elements search screen

After adding some headline text and a drop shadow, I was ready to call the design “done.”

Screenshot of Canva interface showing image creation
The final design – ready to download.

4. Download Your Design

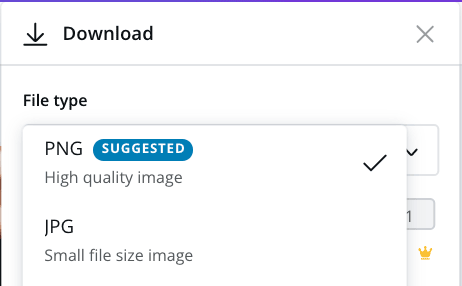
Once the design is done, you can click on the “download” button on the upper right of screen to see your options. Use the JPEG (JPG) option to keep your image file size small.

5. Add Your Featured Image to Your WordPress Post

Log in to your WordPress dashboard and edit the post you’d like to add your featured image to. Once in edit mode, click on the gear icon on the top right and select the “Post” tab.

How to set your Featured Image in WordPress

Finally, just click “Update” or “Publish” to make your change. When you go to preview your website, you should see the featured image added on the home page – and (depending on your theme) possibly at the top of your post.

You can also use the Yoast SEO plugin to set your featured image as your Facebook and Twitter preview images under the “Social” tab.

That’s it! See how easy it was to create a featured image for a WordPress post using Canva?